

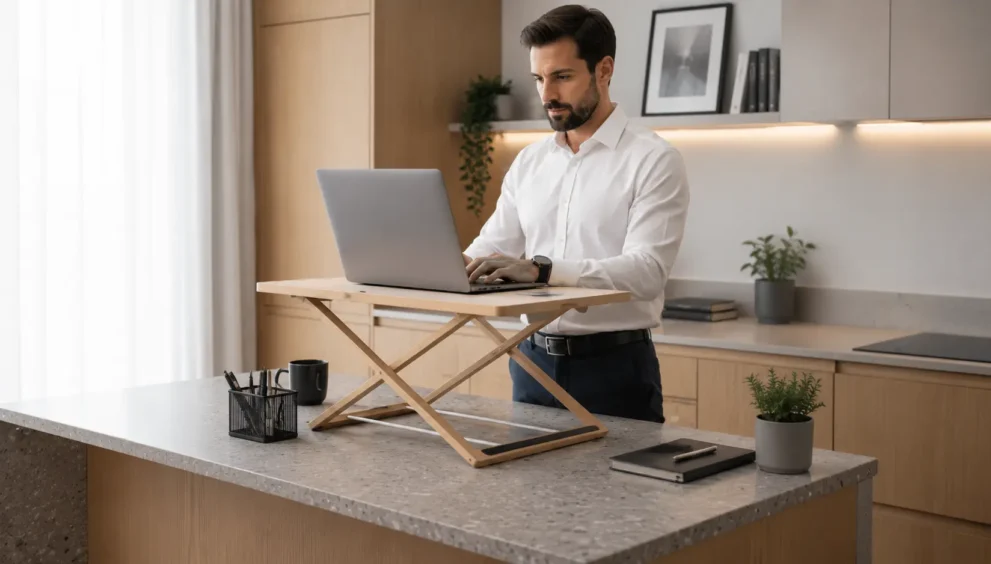
Riser Desk Height: How to Adjust It Right
If you’ve ever wondered what a riser desk is and why height adjustment matters so much, the answer comes down to one simple fact: the wrong height cancels out almost every benefit the desk offers. A riser desk is a platform that sits on top of your existing desk and lifts your monitor, keyboard, and workspace to a standing height whenever you need it. However, owning one isn’t enough on its own. Getting the height genuinely right is what separates a comfortable, productive setup from one that leaves your neck, shoulders, and wrists worse off than before.
This guide walks through exactly how to calculate, adjust, and fine-tune your riser desk height, using the same ergonomic principles professionals rely on — explained simply enough that you can apply them in the next five minutes.
What Is a Riser Desk? A Quick Refresher
A riser desk, sometimes called a desk converter or desktop riser, raises your monitor and keyboard above your existing desk surface. Because it sits directly on top of the desk rather than replacing it, you don’t need to buy a new piece of furniture or drill anything into your wall. Instead, you simply lift the platform when you want to stand and lower it when you want to sit.
Since the whole point of a riser desk is switching comfortably between positions, height accuracy becomes the single most important factor in whether it actually works for your body.
The Elbow-Angle Method: Finding Your Ideal Height
Before adjusting anything, you need a baseline. Ergonomics experts consistently point to one reliable method: the elbow-angle test.
Here’s how it works:
- Sit or stand in a relaxed, natural posture.
- Let your arms hang loosely at your sides.
- Bend your elbows to roughly 90 degrees, as if you were about to type.
- Note the height of your forearms from the floor — that’s your target desk height.
A slight downward slope of 10 to 15 degrees at the wrist is also acceptable, since it keeps your wrists flatter and reduces strain during long typing sessions. On the other hand, an upward angle at the wrist almost always causes discomfort over time, so it’s worth avoiding.
How to Calculate Your Riser Desk Height Addition
Once you know your ideal desk height, calculating how much your riser needs to add is straightforward.
Formula: Ideal desk height − Current desk height = Required riser height
| Step | Example |
|---|---|
| Your ideal desk height (from elbow test) | 31 inches |
| Your current desk height | 27 inches |
| Riser height needed | 4 inches |
Consequently, a riser desk that adds too little height forces you to hunch forward, while one that adds too much pushes your shoulders upward. Either way, the goal is precision, not a rough estimate.
Desk Height by Body Height: A Quick Reference
Because height and arm length vary so much from person to person, a single fixed number rarely works for everyone. The table below offers a general starting range — not an exact rule — based on average proportions.
| Your Height | Approximate Sitting Desk Height | Approximate Standing Desk Height |
|---|---|---|
| 5’0″ – 5’3″ | 24–26 inches | 36–39 inches |
| 5’4″ – 5’7″ | 26–28 inches | 39–42 inches |
| 5’8″ – 5’11” | 28–30 inches | 42–45 inches |
| 6’0″ – 6’3″ | 30–32 inches | 45–48 inches |
| 6’4″+ | 32+ inches | 48+ inches |
These figures work well as a starting point. However, your final adjustment should always come back to the elbow-angle test, since torso length, chair height, and arm proportions can shift the ideal number in either direction.
Why the “Right” Height Isn’t Always the Same Number
It’s worth noting that your ideal riser desk height isn’t fixed forever. Several everyday factors can shift it slightly, and accounting for them prevents the slow, creeping discomfort that often gets blamed on the desk itself.
- Chair height changes. If you switch chairs, or your current chair’s cushion compresses over time, your effective sitting height changes with it.
- Footwear. Standing in shoes with a thicker sole raises your body slightly, which means your standing height may need a small downward adjustment.
- Flooring type. A thick rug or standing mat can add half an inch or more, which matters more than it sounds like over a full workday.
- Posture fatigue. Toward the end of a long day, posture naturally slumps. While this isn’t a reason to change your desk height, it’s a good reminder to reset your position rather than compensate with the desk.
Because of these small variables, treating your calculated height as a solid starting point — rather than a permanent, unchangeable number — tends to produce better long-term comfort than a one-time setup you never revisit.
Monitor Height: The Step Most People Get Wrong
Even with the desk height calculated correctly, an incorrectly positioned monitor undoes most of the benefit. In particular, the top of your screen should sit at or just slightly below eye level, so that your gaze naturally rests on the upper third of the display.
A few quick rules help here:
- If you’re tilting your head back to see the screen, it’s positioned too high.
- If you’re hunching forward or looking down constantly, it’s too low.
- Ideal viewing distance falls between roughly 20 and 28 inches from your eyes, depending on screen size.
Because a riser desk often changes monitor height along with desk height, it’s worth rechecking your screen position every time you adjust between sitting and standing.
Adjusting for Both Sitting and Standing
A riser desk needs to work for two very different postures, and this is where a lot of home office setups fall short. If you’re still deciding whether a riser desk fits your workflow at all — especially in a shared or smaller home office — it’s worth reading riser desk for home offices for a broader look at suitability before fine-tuning the height itself.
That said, once you’ve confirmed it’s the right fit, here’s how the two positions typically differ:
- Sitting height: elbows at 90 degrees while seated, feet flat on the floor, knees also at roughly 90 degrees.
- Standing height: elbows at 90 degrees while standing tall, weight evenly distributed on both feet, shoulders relaxed rather than raised.
Since most risers include preset markers or adjustable stops, marking your ideal sitting and standing heights the first time saves you from re-measuring every single day.
Step-by-Step: Adjusting Your Riser Desk Correctly
Follow these steps whenever you’re setting up your riser desk for the first time or troubleshooting discomfort:
- Start seated. Adjust your chair first so your feet sit flat and your knees form a 90-degree angle.
- Run the elbow test. Let your arms hang, then bend to 90 degrees to find your target height.
- Set the riser to that height. Lock it in place and check for wobble.
- Check your monitor. Adjust it so the top of the screen aligns with eye level.
- Test your typing position. Your wrists should stay flat or slightly angled downward, never upward.
- Repeat while standing. Raise the riser, then redo the elbow and monitor checks in the standing position.
- Mark both heights. If your model has adjustable stops or a memory setting, save both positions so future adjustments take seconds.
Common Height Adjustment Mistakes
Even a well-built riser desk can cause discomfort if it’s set up incorrectly. Watch out for these frequent mistakes:
- Copying someone else’s height. Borrowing a friend’s or coworker’s setting rarely works, since arm length and torso proportions differ.
- Setting it once and forgetting it. Chairs, footwear, and even posture shift over time, so it’s worth rechecking your height every few months.
- Ignoring the monitor after adjusting the desk. Raising the riser without rechecking screen height is one of the most overlooked mistakes.
- Standing too long without a break. A riser desk supports movement, not marathon standing sessions. Alternating every 30 to 45 minutes tends to work well for most people.
- Skipping the wrist check. A desk height that looks correct can still strain your wrists if the keyboard angle is off.
Quick Calibration Checklist
Use this checklist any time you set up a new space or notice tension creeping back in:
- Feet flat on the floor, knees at 90 degrees
- Elbows at roughly 90 degrees while typing
- Top of monitor at or just below eye level
- Wrists flat or sloping slightly downward
- Standing height rechecked separately from sitting height
- Monitor distance between 20 and 28 inches from your eyes
Altogether, this calibration takes about five minutes, and the difference is usually noticeable the same day.
Frequently Asked Questions
How often should I readjust my riser desk height?
Ideally, recheck it every few months or any time you change chairs, shoes, or notice new discomfort.
Is a slightly lower height better than a slightly higher one?
Generally, a marginally lower height is easier on the shoulders than one that’s too high, though neither extreme is ideal long-term.
Do I need the exact same height every day?
Not necessarily. Minor daily variation is normal, but staying within your calculated range keeps strain to a minimum.
Final Thoughts
Getting your riser desk height right isn’t complicated, but it does require a few careful measurements rather than guesswork. By using the elbow-angle method, checking your monitor position, and adjusting separately for sitting and standing, you set yourself up for a genuinely comfortable workday. If you’re still exploring the basics — including how riser desks compare to other options and what actually makes them worth using — this complete breakdown of what a riser desk is, its meaning, types, and real benefits rounds out everything covered here.