

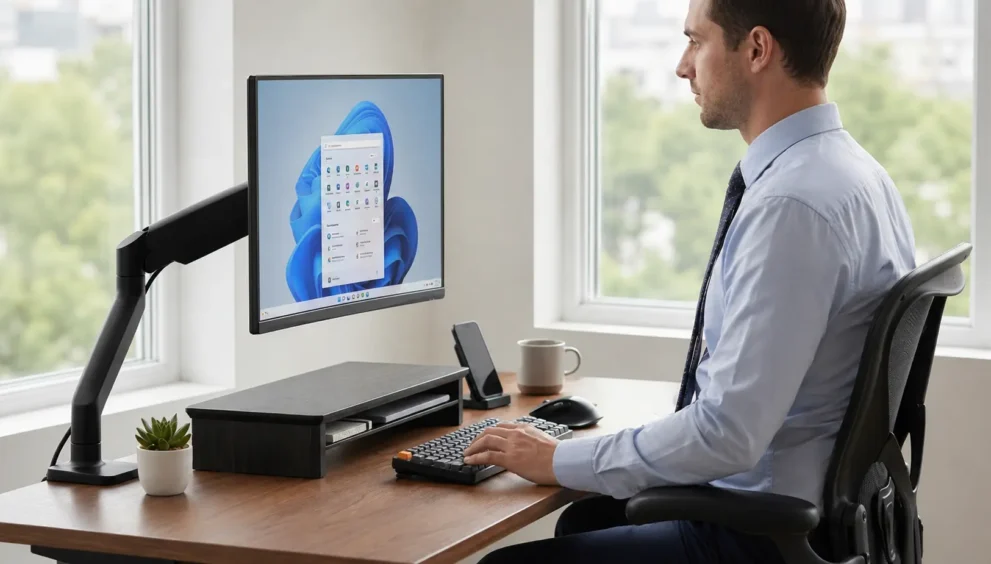
How to Set Up a Riser Desk for Better Posture Right Away
Before diving into the setup itself, it helps to understand what is a riser desk and why it has become such a common recommendation for posture problems. A riser desk sits on top of your existing desk and lifts your monitor and keyboard to a standing height whenever you need it. Because it doesn’t replace your desk or require any installation, it’s one of the fastest ways to correct poor posture without buying new furniture. However, simply owning one isn’t enough — how you set it up determines whether your posture actually improves or quietly gets worse.
This guide walks through a complete, practical setup process so you can start sitting and standing correctly today, not after weeks of trial and error. If you want to go deeper into the exact measurements once your setup is in place, this guide on riser desk height covers the calibration in more detail.
What Is a Riser Desk?
A riser desk, also called a desk converter or desktop riser, raises your workspace above your existing desk surface. You lift it when you want to stand and lower it when you want to sit, which means you get the posture benefits of a standing desk without replacing your furniture. Since it’s portable and adjustable, it also suits renters, hybrid workers, and anyone unsure whether standing work suits them long-term.
Understanding this basic mechanism matters because the setup steps below only work correctly once the riser itself is positioned and adjusted properly. If you’re still deciding whether one belongs on your desk in the first place, this look at riser desk for home office use walks through that decision before you commit to a full setup.
Why Posture Suffers Without a Proper Setup
Poor posture rarely happens all at once. Instead, it builds slowly through small daily habits — a monitor sitting too low, a keyboard placed too high, or shoulders rounding forward during long calls. Over time, these small misalignments compound into stiffness, tension headaches, and lower back strain.
A riser desk interrupts this pattern by giving your body regular opportunities to reset. Nevertheless, this only works if the desk, monitor, and chair are aligned correctly from the start. Otherwise, you simply trade one poor posture for another.
Step-by-Step: Setting Up Your Riser Desk for Better Posture
Follow these steps in order. Each one builds on the last, so skipping ahead usually creates new problems instead of solving old ones.
Step 1: Start With Your Chair, Not the Desk
Before touching the riser, adjust your chair so your feet sit flat on the floor and your knees form roughly a 90-degree angle. This becomes your posture baseline, since every other adjustment is measured against it.
Step 2: Find Your Elbow Angle
Sit naturally and let your arms hang at your sides. Bend your elbows to about 90 degrees, as if you were about to type. The height of your forearms from the floor is your target desk height — this is the number your riser needs to match.
Step 3: Set the Riser to Match That Height
Lift or lower your riser until your keyboard surface lines up with your elbow height. Consequently, your shoulders should stay relaxed rather than raised or hunched forward.
Step 4: Position Your Monitor at Eye Level
The top of your screen should sit at or just slightly below eye level. If you’re tilting your chin up or down to see the screen clearly, your posture will suffer within the hour, regardless of how well the desk itself is set.
Step 5: Check Your Wrist Angle
Your wrists should stay flat or angle very slightly downward while typing. An upward wrist angle is one of the most common causes of strain, so it’s worth double-checking even if the desk height feels correct.
Step 6: Repeat the Process Standing
Raise the riser to standing height and redo the elbow and monitor checks. Standing posture and sitting posture require separate calibration, since your natural arm position changes slightly between the two.
Step 7: Mark or Save Both Heights
If your riser has adjustable stops or memory settings, save both your sitting and standing positions. As a result, future adjustments take seconds instead of requiring a full recheck every time.
Ideal Height Reference by Posture Type
| Posture | Elbow Angle | Monitor Position | Common Mistake |
|---|---|---|---|
| Seated | 90 degrees | Top of screen at eye level | Chair too low, forcing shoulders up |
| Standing | 90 degrees | Top of screen at eye level | Monitor not rechecked after raising desk |
| Transitional (mid-adjustment) | Avoid working here | N/A | Typing while the riser is between heights |
Why This Setup Matters More in 2026 Than Before
Home offices have changed a lot over the past few years. More people now split their time between home, coworking spaces, and the office, which means posture habits have to travel with them rather than staying tied to one fixed desk. Because of this shift, a riser desk has become especially useful — it’s portable, requires no installation, and lets you rebuild the same correct posture setup wherever you happen to be working that day.
At the same time, longer average screen hours have made small posture mistakes more costly than they used to be. A slightly low monitor or a poorly angled wrist might have gone unnoticed during a six-hour office day years ago, but across today’s longer, more fragmented remote work schedules, those same small errors compound faster. As a result, getting the initial setup right — rather than adjusting reactively after discomfort appears — matters more now than it did before.
This is also why a repeatable, step-by-step process works better than guesswork. Once you know your correct elbow angle and monitor height, you can recreate the same setup on any riser desk, in any room, without starting from scratch each time.
Building the Habit, Not Just the Setup
A correctly adjusted riser desk only helps if you actually use it the way it’s designed to be used. Many people set everything up perfectly on day one, then slowly drift back into old habits — slouching in the chair, forgetting to switch positions, or ignoring the monitor after a desk adjustment.
To keep the setup working long-term, a few small habits go a long way:
- Pair height changes with natural breaks. Switching position when you finish a task or wrap up a call feels more natural than watching a clock.
- Keep a visual reminder nearby. A sticky note or a recurring phone alert can help until the habit becomes automatic.
- Notice tension early. Tight shoulders or a stiff neck are early signals worth acting on immediately, rather than waiting until the end of the day.
Ultimately, the setup gives your body the right conditions, but consistency is what turns those conditions into lasting postural improvement. If you eventually find yourself standing more often than sitting, it’s worth comparing whether a riser desk vs standing desk makes more sense for your long-term setup.
Common Mistakes That Undo Good Posture
Even a well-built riser desk can create posture problems if these mistakes creep in:
- Leaning on one side while standing. Shifting your weight to one hip for long periods creates the same imbalance you were trying to avoid.
- Standing too long without alternating. A riser desk supports movement, not marathon standing. Alternating every 30 to 45 minutes tends to work best.
- Skipping the monitor recheck. Raising the desk without adjusting the screen is one of the most overlooked posture killers.
- Using a laptop without an external keyboard. Typing directly on a laptop keyboard while it’s raised on a riser forces your wrists into an unnatural angle.
- Ignoring foot position while standing. Standing with knees locked or weight unevenly distributed strains the lower back, even at the correct desk height.
A Simple Weekly Posture Check
Good posture habits fade quietly, so it’s worth running a short check every week rather than assuming your initial setup still holds.
- Sit down and notice whether your shoulders feel relaxed or slightly raised.
- Stand at your riser and check whether your neck tilts up or down to see the screen.
- Glance at your wrists while typing — flat is ideal, upward is a warning sign.
- Ask whether you’ve been standing or sitting in the same position for more than an hour without switching.
If any of these feel off, it usually takes less than five minutes to readjust and get back on track.
Frequently Asked Questions
How long does it take to notice better posture after setting up a riser desk?
Most people notice reduced shoulder and neck tension within the first few days. However, full postural improvement typically builds over two to three weeks of consistent, correct use.
Should I stand the entire day once I have a riser desk?
No. Standing all day creates its own strain, particularly in the lower back and feet. Alternating between sitting and standing throughout the day works far better than committing to one position permanently.
Can a riser desk fix posture on its own?
Not entirely. A riser desk supports better posture, but chair height, monitor position, and daily movement habits all play an equally important role in the outcome.
What’s the fastest way to check if my setup is correct?
Run the elbow-angle test while seated and standing, then confirm your monitor’s top edge sits at eye level. If both check out, your setup is on the right track.
Final Thoughts
Setting up a riser desk for better posture isn’t complicated, but it does require following the steps in the right order — starting with your chair, moving through elbow and monitor alignment, and finishing with separate calibration for sitting and standing. Once this setup is in place, the improvement in comfort tends to show up quickly, often within the first few days. From there, a short weekly check is usually all it takes to keep your posture on track for the long run.