

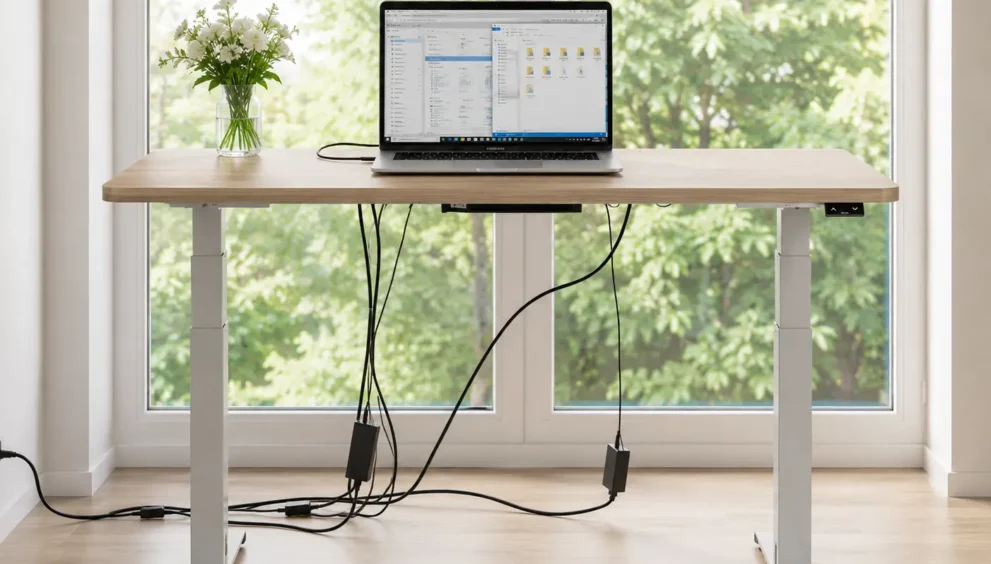
Riser Desk Cable Management: Tips to Stay Organized
Good riser desk cable management turns a cluttered, tangled setup into a clean, functional workspace where cables move smoothly with the platform instead of catching or pulling loose. Because a riser desk changes height throughout the day, its cables face more stress than a fixed desk’s wiring ever does. Without a plan, that stress quickly turns into knots, snags, and even damaged connectors.
Table of Contents
- Why Riser Desk Cable Management Matters
- Common Cable Problems With Riser Desks
- Tools and Accessories for Better Cable Management
- Step-by-Step: Organizing Cables on a Riser Desk
- Cable Management for Electric vs Manual Riser Desks
- Creative DIY Cable Management Ideas
- Cable Safety Considerations for Riser Desks
- Cable Management and Desk Aesthetics
- Common Cable Management Mistakes to Avoid
- Troubleshooting Cable Issues After Setup
- Maintaining a Tidy Setup Long-Term
- Frequently Asked Questions
- Conclusion
Why Riser Desk Cable Management Matters
Unlike a standard desk, a riser desk moves up and down constantly, which means every cable connected to your monitor, keyboard, or power strip moves with it. If cables are too tight, they pull on ports. If they’re too loose, they tangle or catch on the frame.
Beyond convenience, proper cable management also protects your equipment. A cable that gets pinched repeatedly between moving parts can fray internally, which eventually leads to connection issues or even electrical hazards. Taking time to organize cables early prevents these problems before they start.
Common Cable Problems With Riser Desks
Because riser desks combine movement with limited surface space, a few issues show up again and again.
- Cables pulling tight or disconnecting when the platform is raised
- Wires tangling together behind the monitor or keyboard tray
- Cables dangling low enough to catch on chairs or feet
- Power strips sliding around due to no fixed mounting point
- Cables rubbing against the lift mechanism, causing slow wear over time
Recognizing these patterns early makes it much easier to choose the right fix instead of guessing at a solution.
Tools and Accessories for Better Cable Management
A few simple accessories go a long way toward keeping cables organized without costing much.
- Cable sleeves: These bundle multiple cables into one flexible tube, reducing visual clutter and tangling.
- Adhesive clips: Small clips attached to the underside of the platform keep cables from dangling or swinging during height changes.
- Cable trays or baskets: Mounted underneath the desk, these hold power strips and excess cable length out of sight.
- Velcro cable ties: Reusable ties let you bundle and adjust cable length as your setup changes.
- Spiral wrap: This flexible wrap protects cables from friction against the lift columns while keeping them together.
Because riser desks vary in size and design, it’s worth measuring your platform before buying accessories to make sure clips and trays actually fit your model. A mismatch in size often leads to accessories that slide loose or fail to hold cables securely.
Step-by-Step: Organizing Cables on a Riser Desk
Once you have the right accessories, following a clear process makes the setup faster and more effective.
Step 1: Unplug and Lay Out All Cables
Start by disconnecting everything and laying each cable out separately. This makes it easier to see exactly how much slack you have to work with.
Step 2: Group Cables by Function
Next, group cables based on what they connect, such as power, monitor, and peripherals. Keeping similar cables together simplifies the bundling process later.
Step 3: Measure for Height Adjustment Slack
Because the desk moves, leave enough slack in each cable to accommodate the full height range. Test this by raising the platform to its highest point before securing anything permanently.
Step 4: Bundle Cables With Sleeves or Ties
Once slack is confirmed, bundle grouped cables together using sleeves or Velcro ties. This keeps them from tangling while still allowing some flexibility during movement.
Step 5: Attach Clips Along the Platform Edge
After bundling, attach adhesive clips along the underside or back edge of the platform. This routes cables away from moving joints and keeps them out of sight.
Step 6: Secure the Power Strip
Finally, mount or tuck your power strip into a tray or basket so it doesn’t slide around every time the desk height changes.
Step 7: Test the Full Range of Motion
With everything secured, raise and lower the desk through its entire range several times. Watch closely for any tight pulls or snags before considering the setup finished.
Cable Management for Electric vs Manual Riser Desks
The type of riser desk you own slightly changes how you should approach cable management.
- Manual riser desks typically involve fewer cables, since there’s no motor or control panel to power. Focus mainly on monitor and peripheral cables here.
- Electric riser desks add a motor cable and often a control panel wire, both of which need extra slack and protection since they run closer to moving parts.
- Dual-tier converters often separate the keyboard tray from the monitor platform, meaning cables must account for two moving levels instead of one.
Because electric models introduce more wiring, they generally benefit the most from dedicated cable trays and clips placed at multiple points along the frame.
Creative DIY Cable Management Ideas
If you’d rather avoid buying extra accessories, several household items work surprisingly well for basic cable control.
- Binder clips can pinch cables in place along the edge of the platform
- An old shoebox tucked underneath the desk hides a power strip and excess cable length
- Bread clips or twist ties help label and separate individual cables
- A repurposed pen holder can double as a small cable organizer for loose cords
- Command hooks stuck to the frame create simple, removable cable guides
These low-cost solutions work especially well for smaller riser desks or temporary setups where a full accessory kit isn’t necessary. Many of them can also be swapped out later for dedicated accessories once you know exactly how your cables need to be routed.
Cable Safety Considerations for Riser Desks
Beyond tidiness, cable placement directly affects electrical safety, especially on a surface that moves throughout the day. A few small habits make a meaningful difference in preventing long-term damage.
- Keep power cables away from the lift mechanism entirely, since repeated pinching can expose internal wiring over time
- Avoid overloading a single power strip with too many high-draw devices, particularly on electric riser desks
- Check cables periodically for nicks, fraying, or exposed wire near connectors
- Route cables so they never rest directly on sharp metal edges of the frame
- Unplug and inspect any cable that feels warm during normal use
Because these checks take only a minute or two, building them into your regular desk routine is far easier than dealing with a damaged cable or connector later. A quick monthly glance is usually all it takes to catch a problem early.
Cable Management and Desk Aesthetics
A tidy cable setup doesn’t just prevent tangles; it also changes how your entire workspace feels. Visible clutter behind a monitor can make even a well-organized desk look messy at a glance.
Matching cable colors to your desk or wall background helps sleeves and clips blend in rather than stand out. Similarly, routing cables along the back edge of the platform, rather than letting them hang freely, keeps the front-facing view clean during video calls or in-person meetings.
For anyone working from a shared space or on camera regularly, this visual difference matters just as much as the functional benefits of reduced tangling and easier troubleshooting. A clean background can leave just as strong an impression as a well-lit room.
Even with good intentions, a few habits tend to undo otherwise solid cable management.
- Leaving cables too tight, which causes pulling or disconnection during height changes
- Bundling too many cables into one sleeve, making individual cables hard to trace later
- Routing cables directly across the lift mechanism instead of around it
- Forgetting to test the full height range after making adjustments
- Using tape directly on cables, which leaves sticky residue and can damage the outer coating
Avoiding these mistakes keeps your setup both tidy and safe over the long run.
Troubleshooting Cable Issues After Setup
Even a carefully organized setup sometimes runs into small problems once the desk is in daily use. Here’s how to handle the most common ones.
A cable disconnects when the desk is raised: This usually means there’s not enough slack for the full height range. Loosen the bundle slightly and retest at the highest setting before securing it again.
Cables keep sliding out of clips: Adhesive clips can lose their grip over time, especially in warmer rooms. Clean the surface before reattaching, or switch to a slightly larger clip size for a firmer hold.
The power strip keeps sliding around: Without a fixed mounting point, power strips shift easily during height changes. A small tray or a strip of Velcro underneath solves this quickly.
Cables look tidy but still tangle when the desk moves: This often means cables were bundled too tightly at one end and left loose at the other. Redistribute the slack evenly across the bundle to fix the imbalance.
If a fix doesn’t hold after a few days of normal use, it’s usually worth revisiting the entire routing path rather than patching the same spot repeatedly. A fresh start often reveals a simpler solution than the one you were trying to force.
Cable management isn’t a one-time task, especially since setups change as you add or replace equipment.
- Recheck cable slack every few months, particularly after adjusting your standing height preferences
- Replace worn cable ties or clips before they fail completely
- Dust cable trays and sleeves occasionally, since buildup can attract more clutter
- Reassess your routing whenever you add a new monitor, light, or accessory
Building these small checks into your regular desk maintenance keeps cable clutter from creeping back in over time.
Frequently Asked Questions
How much cable slack do I need for a riser desk?
You need enough slack to comfortably reach the platform’s highest position without pulling on any connector. A good rule of thumb is to test the full height range before securing cables permanently, then add a small buffer beyond that point.
Can cable clutter actually damage my riser desk?
Yes, over time. Cables rubbing against the lift mechanism can fray internally, and tight cables can strain ports or connectors. Left unaddressed, this can lead to slower height adjustment or intermittent connection issues with your equipment.
What’s the easiest way to manage cables on an electric riser desk?
Focus first on the motor and control panel cables, since these run closest to moving parts. Use a spiral wrap or sleeve to protect them, then route peripheral cables separately using clips along the platform edge.
Do I need to buy accessories, or can I use household items?
Household items like binder clips, shoeboxes, and command hooks work well for basic organization, especially on smaller setups. Dedicated accessories like cable trays and adhesive clips offer a cleaner, more durable solution if you want a long-term fix.
How often should I redo my riser desk cable management?
Most setups only need a quick recheck every few months, or whenever you change your equipment. If you notice cables pulling, tangling, or sagging again, that’s a clear sign it’s time to reorganize.
Conclusion
Solid riser desk cable management doesn’t require a complicated setup, just a bit of planning around how your desk moves. By grouping cables, leaving enough slack, and securing everything away from the lift mechanism, you’ll end up with a workspace that stays tidy no matter how often you switch between sitting and standing. Small habits like rechecking slack and replacing worn clips keep that tidiness lasting well beyond the first setup.