
How to Assemble a Riser Desk
Setting up a new workstation should feel exciting, not confusing. But before you even open the box, it helps to know what a riser desk is and how its parts fit together. Yet many people see loose bolts and metal panels and immediately feel overwhelmed. This guide removes that stress completely.
Table of Contents
- What Is a Riser Desk? (Quick Overview)
- Types of Riser Desks and Why It Affects Assembly
- Tools You’ll Need Before You Start
- What’s Inside the Box: Parts Checklist
- Step-by-Step Assembly Instructions
- Post-Assembly Adjustments
- Common Assembly Mistakes to Avoid
- How Long Does It Take to Assemble a Riser Desk?
- Riser Desk Assembly Safety Tips
- Troubleshooting: What to Do If Something Doesn’t Fit
- Maintaining Your Riser Desk After Assembly
- Frequently Asked Questions
- Final Thoughts
What Is a Riser Desk? (Quick Overview)
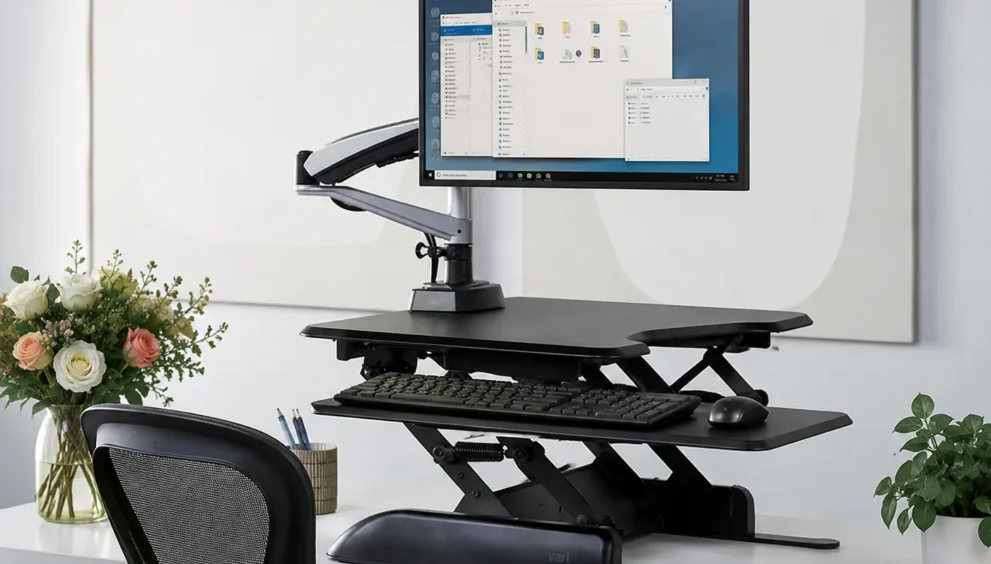
A riser desk, also called a desk converter or standing desk converter, is a platform that sits on top of an existing desk. It lifts your monitor, keyboard, and workspace so you can switch between sitting and standing. Because it uses a spring-loaded or gas-lift mechanism, raising and lowering it takes just seconds. This makes it one of the easiest ways to add a sit-stand option without replacing your entire desk.
Unlike a full standing desk, a riser desk requires no drilling into your existing furniture. As a result, it’s a popular choice for renters, small offices, and anyone testing out a sit-stand routine before committing to bigger changes.
Now that the basics are clear, let’s look at why the type of riser desk you own changes how assembly works.
Types of Riser Desks and Why It Affects Assembly
Not every riser desk goes together the same way. Before you start, it helps to know which category yours falls into, since the steps below vary slightly depending on the design.
- Single-tier converters: One flat platform for both keyboard and monitor. These usually have the simplest assembly, often just a base and a lift mechanism.
- Dual-tier converters: A separate keyboard tray sits below the monitor platform. Because there are two connected levels, alignment matters more during assembly.
- Manual spring-lift models: Height adjusts by hand, using a spring or gas-lift system that needs tension calibration during setup.
- Electric riser desks: Height adjusts with a motor and a control panel, which means you’ll also need to connect a power cable and, in some cases, a small control unit.
Once you’ve identified your type, gather the tools listed below before opening every bag of hardware.
Tools You’ll Need Before You Start
Most riser desks arrive mostly pre-assembled, so you won’t need a full toolbox. However, having the right items on hand speeds things up considerably.
- Phillips screwdriver (often included in the box)
- A flat, clear surface to work on
- Someone to help lift the frame, especially for larger models
- A soft cloth or blanket to protect the desk surface underneath
- The included Allen key, if your model uses hex bolts
- A small tray or cup to hold loose screws so nothing rolls away
Once your tools are ready, unbox the desk carefully and lay every part out where you can see it.
What’s Inside the Box: Parts Checklist
Before starting, confirm nothing is missing. A missing bolt is the most common reason assembly stalls halfway through.
| Part | Typical Quantity |
|---|---|
| Base platform (keyboard tray) | 1 |
| Upper platform (monitor deck) | 1 |
| Support arms or columns | 2 |
| Mounting screws and bolts | 8–16 |
| Allen key or screwdriver | 1 |
| Cable management clips | 1–2 |
| Power adapter (electric models only) | 1 |
| Instruction manual | 1 |
If anything is missing, contact the manufacturer before you proceed. Trying to force the assembly without full parts risks damaging the frame, and it often voids the warranty too.
Step-by-Step Assembly Instructions
Follow these steps in order. Skipping ahead is the fastest way to create alignment problems later.
Step 1: Clear and Prepare Your Desk Surface
First, clear your desk completely. Remove your monitor, keyboard, and any cables. A clean surface prevents scratches and gives you full visibility of the assembly area.
Step 2: Sort and Identify All Hardware
Next, lay out every screw, bolt, and bracket by size. Compare them against the manual’s hardware diagram. This small step saves significant time once real assembly begins.
Step 3: Attach the Support Columns to the Base Platform
Align the support columns with the pre-drilled holes on the base platform. Insert the provided bolts by hand first, so the threads don’t cross. Then tighten fully with the screwdriver or Allen key.
Step 4: Secure the Spring or Gas-Lift Mechanism
Because this mechanism controls the height adjustment, it must sit perfectly straight. Check the manual for the correct tension setting before locking it into place with the designated screws.
Step 5: Mount the Upper Platform
After the columns are secure, lift the upper platform onto the arms. Line up the mounting brackets precisely. Two people make this step much easier, especially on wider models.
Step 6: Attach the Lower Keyboard Tray (Dual-Tier Models Only)
If your model has a separate keyboard tray, slide it into the designated bracket beneath the monitor platform. Secure it with the shorter bolts, since these are usually sized differently from the frame bolts.
Step 7: Connect Power Components (Electric Models Only)
For electric riser desks, connect the motor cable to the control panel before plugging in the main power adapter. Route the cable away from moving joints to prevent pinching.
Step 8: Tighten All Connection Points
Once everything is in place, go back and tighten every bolt again. Vibration from shipping and initial assembly can leave connections slightly loose.
Step 9: Test the Height Adjustment Mechanism
Now, slowly raise and lower the desk through its full range several times. It should move smoothly without grinding, sticking, or leaning to one side.
Step 10: Attach Cable Management Clips
Finally, clip any included cable organizers to the frame. This keeps power cords and monitor cables from tangling as you switch between sitting and standing.
Step 11: Reposition Your Monitor and Keyboard
With assembly complete, place your monitor on the upper platform and your keyboard on the lower tray. Adjust the height so your eyes align with the top third of the screen.
Post-Assembly Adjustments
After assembly, a few small tweaks make a big difference in daily comfort.
- Set your preferred standing height and note the mark on the column for quick reference
- Adjust monitor distance so it sits roughly an arm’s length away
- Recheck bolt tightness after the first week of regular use
- For electric models, save your standing and sitting presets in the control panel
These adjustments turn a technically correct assembly into a genuinely comfortable workstation.
Common Assembly Mistakes to Avoid
Even simple assembly can go wrong if a few details get overlooked. Watch for these frequent errors:
- Tightening bolts fully before all parts are aligned, which makes later adjustments difficult
- Skipping the manual’s tension setting for the gas-lift spring
- Placing the desk on an uneven or unstable surface
- Forgetting to test the height range before loading it with equipment
- Overloading the platform beyond its listed weight capacity
- Mixing up left and right support arms on models where they aren’t identical
- Routing power cables across moving joints on electric models
Avoiding these issues keeps the desk stable and extends its lifespan considerably.
How Long Does It Take to Assemble a Riser Desk?
For most standard models, assembly takes between 15 and 30 minutes. Compact converters with fewer parts can take as little as 10 minutes. Larger dual-tier or electric models, however, may take closer to 45 minutes, particularly for a first-time setup.
| Riser Desk Type | Estimated Assembly Time |
|---|---|
| Single-tier manual | 10–15 minutes |
| Dual-tier manual | 20–30 minutes |
| Electric with control panel | 30–45 minutes |
Riser Desk Assembly Safety Tips
Because these desks involve moving mechanical parts, a few precautions matter.
- Keep fingers clear of the hinge points while testing height adjustment
- Never exceed the manufacturer’s stated weight limit
- Ensure the desk sits on a flat, stable surface before use
- Double-check all bolts before placing heavy equipment on top
- Ask for help lifting larger platforms to avoid strain or dropped parts
- Unplug electric models before making any adjustments to the frame
Following these tips protects both you and the equipment resting on the desk.
Troubleshooting: What to Do If Something Doesn’t Fit
Sometimes, despite careful assembly, something feels off. Here’s how to handle the most common issues.
The platform leans to one side: Loosen the bolts on the higher side slightly, realign the arms, then retighten evenly on both sides.
The height adjustment feels stiff: Check the manual for the correct spring tension setting, since an incorrect setting is the usual cause.
Bolts won’t align with the holes: Confirm you haven’t mixed up the left and right support arms, as many models are not interchangeable.
The desk wobbles after full assembly: Recheck every connection point. A single loose bolt anywhere in the frame can cause wobbling throughout the structure.
An electric model won’t power on: Verify the motor cable and control panel connections. A loose connector is the most common cause of power issues after assembly.
Maintaining Your Riser Desk After Assembly
Good assembly is only the first step. Regular maintenance keeps everything working smoothly for years.
- Wipe down the platform surfaces monthly to prevent dust buildup around moving joints
- Recheck bolt tightness every few months, especially if you adjust height often
- Lubricate the lift mechanism occasionally if your manual recommends it
- Inspect cables on electric models for wear near connection points
Consistent upkeep prevents small issues from turning into bigger repairs later.
Checking Your Workspace Before Assembly
A few minutes of planning before you even open the box prevents wasted effort later. Take these steps first.
- Measure your existing desk depth to confirm the riser platform will fit comfortably
- Check that your desk surface can support the riser’s weight plus your equipment
- Clear enough wall space if you’re near a power outlet for electric models
- Decide on your final desk placement, since moving a fully assembled unit is harder than moving an empty desk
Once your workspace is confirmed, you can move through assembly without needing to stop and rearrange furniture halfway through.
Frequently Asked Questions
Do I need professional help to assemble a riser desk?
No. Most riser desks are designed for straightforward home assembly using only the included tools.
Can one person assemble a riser desk alone?
Yes, for smaller single-tier models. Larger dual-tier or electric desks are easier and safer to assemble with a second person.
What if my riser desk arrives with extra screws?
This is common, as manufacturers often include spares for different mounting configurations. It doesn’t indicate a missing step.
Is it normal for the height adjustment to feel tight at first?
Yes. New spring mechanisms often loosen slightly after the first several uses.
How do I know if my riser desk is fully and correctly assembled?
Test the full height range, check that the platform sits level, and confirm every bolt is tight. If it moves smoothly without wobbling, assembly is complete.
Can I disassemble a riser desk later if I move?
Yes. Most models reverse the same steps used for assembly, so keeping the original manual and hardware bag makes future moves much easier.
Final Thoughts
Assembling a riser desk doesn’t require special skills or tools. Now that you know what a riser desk is and how each part connects, the process feels far less intimidating. By identifying your model type, checking parts beforehand, and following each step in order, you’ll have a stable sit-stand workstation ready in under an hour. Regular maintenance afterward keeps it working smoothly for years to come.