
Learning how to clean hydronic baseboard heaters correctly protects the boiler that feeds them, not just the fins you can see. Unlike electric units, a hydronic system pulls hot water through a sealed loop, so cleaning mistakes here can ripple back into pressure, air, and corrosion problems throughout the whole house. This guide focuses specifically on the water-side maintenance that most general baseboard heater cleaning guides skip entirely: bleeding trapped air, checking system pressure, spotting early leaks, and protecting the boiler connection itself.
Because hydronic units share their water with every other radiator in the loop, a small issue at one baseboard heater can eventually show up somewhere else in the house. Consequently, treating the cleaning process as a whole-system check, rather than a single-unit chore, saves real repair costs down the line.
How a Hydronic Baseboard Heater Actually Works
A hydronic baseboard heater carries hot water through a copper pipe wrapped in aluminum fins. The boiler heats the water, a pump circulates it through the loop, and each baseboard unit releases warmth into the room as air passes over the fins. Nothing burns; nothing sparks. The entire system runs on water pressure and circulation.
That distinction matters for cleaning. Since there’s no exposed electrical element, moisture around the fins isn’t dangerous the way it would be on an electric unit. However, the water inside the pipe is under pressure, and disturbing a fitting or valve carelessly can introduce a leak that wasn’t there before.
Most homes run either a single-zone loop or several zones controlled by separate valves. Before touching anything, identify which zone feeds the unit you’re cleaning, since shutting down the wrong zone leaves the heater live while you work.
Tools Specific to Hydronic Systems
Beyond the standard vacuum, brush, and microfiber cloth used on any baseboard heater, hydronic units call for a few additional tools that electric systems never need:
- A radiator key or bleed valve wrench, sized to fit your system’s bleed screw
- A small container to catch water released during bleeding
- A pressure gauge, if your boiler doesn’t already display one clearly
- Plumber’s tape, in case a fitting needs resealing after inspection
- A flashlight for checking hidden joints behind the unit
Gather these before starting, since discovering a missing bleed key halfway through the job means walking away with the cover already off and air still trapped in the line.
Bleeding Air From the Line: The Step Most Guides Skip
Air trapped inside a hydronic loop is the single most common cause of a baseboard heater that stays lukewarm even after cleaning. Water can’t fully fill a pipe with an air pocket in it, so heat transfer drops in that section regardless of how clean the fins are.
Follow this sequence to bleed a hydronic baseboard heater properly:
- Turn off the circulator pump, or shut down the boiler entirely if it’s a single-zone system, so water isn’t actively moving through the loop.
- Locate the bleed valve, usually a small screw near one end of the unit or on a nearby manifold.
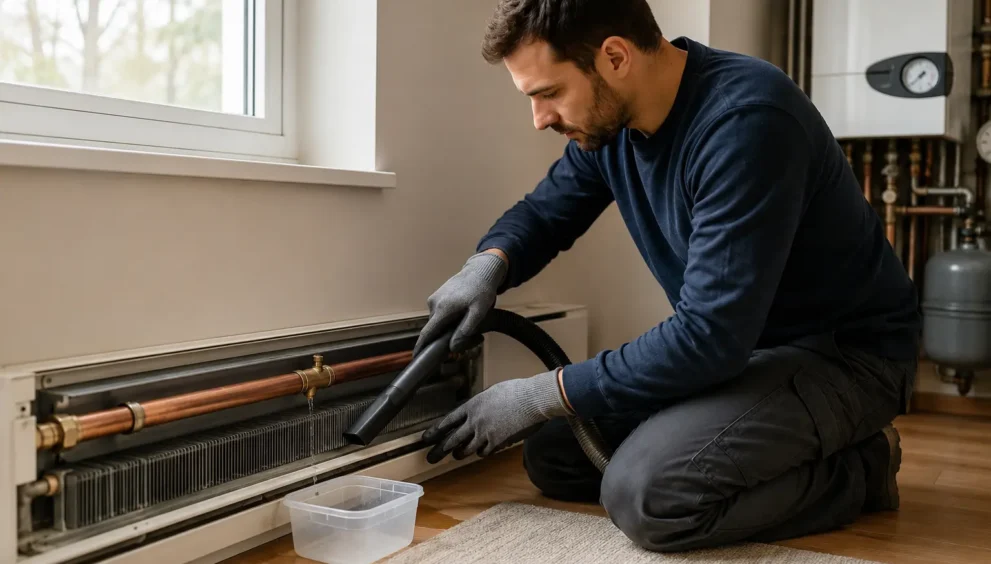
- Hold a small container beneath the valve to catch any water that escapes during bleeding.
- Turn the bleed key slowly counterclockwise until you hear a hiss of escaping air.
- Keep the valve open until water flows out in a steady stream, without sputtering, then close it firmly.
- Restart the circulator and confirm the unit heats evenly across its full length within twenty minutes.
If bleeding produces a strong hiss but no water follows within a minute or two, the air pocket may be larger than expected, or a second air lock exists elsewhere in the loop. In that case, checking the highest point in the system, often on an upper floor, usually resolves it.
Checking System Pressure Before You Close Everything Up
A properly pressurized hydronic system typically sits between 12 and 15 psi when cold, though your boiler’s manual will list the exact target. Bleeding air naturally drops pressure slightly, so checking the gauge afterward is a step worth building into every cleaning session.
If pressure reads low after bleeding, most residential boilers have an automatic fill valve that restores it within minutes. If pressure keeps dropping over the following days, that pattern points toward a slow leak somewhere in the loop rather than a one-time air pocket.
Pressure that reads unusually high, on the other hand, can strain fittings and eventually cause a joint to weep. A pressure-reducing valve near the boiler typically controls this, and it’s worth having a technician inspect it if readings consistently run above the recommended range.
Spotting Early Leak Signs While the Cover Is Off
Removing the cover for cleaning gives you a rare, direct look at the pipe and fittings that stay hidden the rest of the year. Use that access deliberately, since catching a leak early is far cheaper than repairing water damage later.
Look for these specific signs while the fins are exposed:
- Mineral deposits or a chalky white residue at any joint or fitting
- A faint but persistent damp smell, even if no visible water is present
- Slight rust or discoloration on the pipe where it meets a valve
- A gurgling sound that returns within days of bleeding the same section
- Soft or discolored flooring directly beneath the unit
None of these signs demand an emergency call by themselves, but two or more appearing together is a reasonable signal to have a heating technician trace the loop before the issue grows.
Cleaning the Fins Without Disturbing the Water Side
Once the water-side checks are done, cleaning the fins themselves follows a straightforward process, though a few hydronic-specific details matter here too. Since there’s no electrical risk, you have more flexibility than an electric unit allows, but the copper pipe underneath still deserves gentle handling.
- Vacuum along the full length of the fins first, using a crevice tool to reach between each one without bending them.
- Follow with a lightly damp microfiber cloth if buildup remains, since hydronic fins tolerate moisture far better than an electric coil.
- Avoid pressing directly on the copper pipe itself while cleaning, since repeated pressure can eventually loosen a soldered joint.
- Straighten any bent fins with needle-nose pliers, working slowly from one end toward the other.
- Wipe down the exterior cover separately with warm, soapy water, then dry it fully before reattaching.
Because hydronic pipes run the full length of the unit, dust tends to settle more evenly across the fins compared to the coil-heavy hot spots seen on electric units. A steady, full-length pass with the vacuum usually clears it in one go.
Protecting the Boiler Connection During Maintenance
The point where the baseboard loop connects back to the boiler deserves a quick visual check every time you clean a unit near it, even if that particular baseboard isn’t the one being cleaned that day. A weak connection here affects every unit downstream on the same zone.
Check that the shutoff valve near the boiler turns smoothly without excessive resistance, since a stiff valve often signals mineral buildup that will eventually seize entirely. Also glance at the expansion tank, if your system has one, for signs of waterlogging or a hissing air valve.
If your boiler uses a corrosion inhibitor additive in the water, most manufacturers recommend testing its concentration every one to two years. A weak inhibitor level allows internal rust to build gradually, which shows up eventually as reduced heat output across the whole loop rather than just one unit.
How Often Hydronic Systems Need This Level of Attention
Fin cleaning follows roughly the same annual rhythm as any baseboard heater, but the water-side checks covered here don’t need to happen every single time you dust the fins. A practical schedule looks like this:
- Fin cleaning and a quick visual leak check: once a year, before heating season
- Full bleed of every zone: once a year, typically in early fall
- Pressure gauge check: each time you bleed the system
- Corrosion inhibitor test: every one to two years, or per your boiler’s manual
- Full technician inspection of the boiler connection: every two to three years
Homes with older cast-iron boilers or systems installed before 2010 generally benefit from checking pressure and inhibitor levels slightly more often, since older seals and fittings tend to develop small leaks earlier than newer components.
Common Mistakes That Are Unique to Hydronic Units
A few mistakes show up specifically with hydronic systems that simply don’t apply to electric baseboard heaters, since the failure modes are completely different.
- Bleeding a valve too quickly, which can cause water to spray rather than release in a controlled stream
- Overtightening a bleed screw after closing it, which can crack the valve seat over time
- Ignoring a gurgling sound because “it’s just air,” when it actually signals a slow leak feeding new air into the loop
- Skipping the pressure check after bleeding, missing an early sign of a developing leak
- Pressing too hard on the copper pipe while cleaning, which can loosen a joint that was already slightly worn
Working slowly and checking the pressure gauge after every bleed catches most of these mistakes before they turn into a bigger repair.
Handling Multi-Zone Systems Without Missing a Section
Larger homes often split hydronic heating into two or more zones, each with its own circulator or zone valve. Cleaning one baseboard heater in isolation, without considering the rest of its zone, means missing problems that only show up when the whole loop runs together.
Before starting seasonal maintenance, walk through each zone individually and confirm the following:
- Every unit on the zone heats evenly, without one section noticeably cooler than the rest
- The zone valve opens and closes fully when the thermostat calls for heat
- No single unit takes noticeably longer to warm up than its neighbors on the same loop
- The circulator for that zone runs quietly, without a grinding or humming sound
A single cold unit on an otherwise warm zone almost always points to trapped air rather than a dirty heater, since dust reduces output gradually across the whole zone rather than isolating one unit. Bleeding that specific baseboard first, before assuming a bigger fault, resolves the issue in most cases.
Homes with zones added at different times, such as a finished basement retrofitted years after the original installation, sometimes run on mismatched pipe sizing. If one zone consistently underperforms no matter how thoroughly it’s bled and cleaned, that mismatch is worth mentioning to a heating technician rather than continuing to chase it through routine maintenance alone.
Why This Maintenance Pays Off Beyond a Single Winter
A hydronic system that’s bled, pressure-checked, and inspected annually tends to outlast one that’s only ever wiped down on the surface. The fins might look clean either way, but the water side is where the real wear accumulates over years of use.
Consistent attention to air bleeding and pressure keeps the circulator pump from working harder than necessary, since trapped air forces it to push against resistance it shouldn’t have to fight. That extra strain shortens pump life well before most homeowners would otherwise notice a problem.
Treating hydronic baseboard heater cleaning as a whole-loop task, rather than a single-unit wipe-down, is the difference between a system that runs quietly for two decades and one that needs boiler repairs far sooner than it should. A few extra minutes with a bleed key each fall protects the entire heating system, not just the unit you can see.
Conclusion
Hydronic baseboard heater cleaning boils down to one core habit: bleed the air, check the pressure, and glance for early leak signs every time you dust the fins. The fins matter less than the water side — that’s where real wear happens over the years. A few extra minutes each fall keep the whole loop, not just one unit, running efficiently for decades.