
How to Clean Baseboard Heaters the Right Way
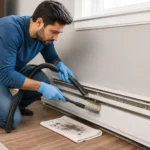
Learning how to clean baseboard heaters properly can lower your heating bills, improve indoor air quality, and help your system last longer. A neglected heater collects dust, pet hair, and debris inside the fins, forcing it to work harder just to keep a room warm.
This guide walks through every step of baseboard heater cleaning, covers both electric and hydronic systems, and explains the tools, timing, and safety precautions that most short guides skip entirely. By the end, you’ll know exactly how to clean baseboard heaters safely, thoroughly, and without damaging the delicate fins inside.
Table of Contents
- What Is a Baseboard Heater and Why Cleaning It Matters
- Signs Your Baseboard Heater Needs Cleaning
- How Baseboard Heaters Work
- Electric vs Hydronic Baseboard Heaters: Cleaning Differences
- Tools and Supplies You’ll Need
- DIY vs Professional Baseboard Heater Cleaning: Cost Comparison
- Safety Precautions Before You Start
- How to Clean Baseboard Heaters Step by Step
- How to Clean Electric Baseboard Heaters
- How to Clean Hydronic Baseboard Heaters
- How to Clean Baseboard Heater Covers
- How to Straighten Bent Baseboard Heater Fins
- How to Remove Rust From Baseboard Heater Fins
- Removing Dust, Pet Hair, and Allergens From Baseboard Heaters
- Baseboard Heater Odor Removal: Why It Smells When You Turn It On
- Cleaning Baseboard Heaters in Homes With Pets
- How Often Should You Clean Baseboard Heaters
- How to Clean Heater Vents and Airflow Openings
- Preventive Maintenance Tips
- Common Mistakes to Avoid
- How Cleaning Improves Efficiency and Lowers Energy Bills
- How Baseboard Heater Cleaning Affects Indoor Air Quality
- Troubleshooting: When Cleaning Isn’t Enough
- Seasonal Baseboard Heater Cleaning Checklist
- Long-Term Benefits of Regular Maintenance
- Frequently Asked Questions
- Final Thoughts
What Is a Baseboard Heater and Why Cleaning It Matters
A baseboard heater is a low-profile heating unit installed along the floor at the base of a wall. Unlike central forced-air systems, it heats a room through natural convection rather than a blower or fan.
Inside the unit sits a series of thin metal fins wrapped around either an electric heating element or a copper pipe carrying hot water. As air passes over these fins, it warms up and rises into the room, pulling cooler air in from below.
That constant air movement is exactly why baseboard heater cleaning matters so much. Every bit of dust, pet dander, and lint floating near the floor eventually gets pulled through the fins and trapped there, sometimes for months before anyone notices.
Over time, this buildup insulates the fins, blocking the very airflow the system depends on. Consequently, the heater has to run longer and work harder to reach the same temperature, which quietly drives up your energy bill.
Signs Your Baseboard Heater Needs Cleaning
Most homeowners only think about baseboard heater cleaning once a problem becomes obvious. However, several early warning signs appear well before that point:
- A burning-dust smell when you turn the heat on for the first time each season
- Visible dust, fur, or lint clinging to the fins when you peek behind the cover
- A room that takes noticeably longer to warm up than it used to
- Reduced airflow you can feel by holding your hand near the top of the unit
- Higher energy bills without any change in your thermostat settings
- Rattling, ticking, or popping noises as the unit heats and cools
If two or more of these sound familiar, it’s a strong signal that dusty baseboard heater buildup is already affecting performance, and a thorough cleaning session is overdue.
Catching these signs early, rather than waiting for the heater to stop working altogether, keeps the fix simple. A quick cleaning session resolves nearly all of them without needing any repair or replacement.
How Baseboard Heaters Work
Understanding the mechanism behind baseboard heating makes the cleaning process much easier to follow, since you’ll know exactly what you’re looking at once the cover comes off.
Cool air near the floor enters through a gap at the bottom of the unit. As it passes over the heated fins, it warms and rises, pulling more cool air in behind it, in a continuous convection loop.
The fins themselves are the heart of the system. Whether they’re heated electrically or by hot water, their job is to expose as much surface area as possible to the passing air, which maximizes heat transfer.
Because the entire process depends on unrestricted airflow, anything that clogs the spaces between the fins directly reduces how much heat actually reaches the room, regardless of how high the thermostat is set.
The cover itself plays a bigger role than most people realize. Its slots and gaps are engineered to guide air in at the bottom and release warm air at the top in a specific pattern.
When furniture, curtains, or rugs block those openings, the convection cycle slows down even if the fins inside are perfectly clean. Airflow around the entire unit matters just as much as airflow through the fins.
This is also why baseboard heaters are almost always installed under windows. Cold air naturally settles near glass, so positioning the heater there lets it intercept and warm that air before it spreads across the floor.
Electric vs Hydronic Baseboard Heaters: Cleaning Differences
Not every baseboard heater cleans the same way. Electric and hydronic (hot water) systems share a similar outer design, but the internal components and safety steps differ in a few important ways.
| Feature | Electric Baseboard Heater | Hydronic Baseboard Heater |
|---|---|---|
| Heat source | Electric resistance coil | Hot water from a boiler |
| Power-off step | Switch off the circuit breaker | Turn off the thermostat/zone valve |
| Water exposure risk | High — avoid all moisture | Lower — damp cloths are generally safe |
| Cleaning frequency | Once a year, twice with pets | Once a year, twice with pets |
| Common issue after cleaning | Bent coils reduce output | Bent copper fins reduce output |
| Best cleaning tool | Dry vacuum, soft brush | Vacuum plus lightly damp cloth |
As the table shows, the biggest difference comes down to moisture. Electric heaters carry a real shock risk if any liquid reaches the coil, while hydronic units tolerate a damp cloth on the exterior fins without issue.
Tools and Supplies You’ll Need
Before starting any baseboard heater cleaning session, gather everything in advance so you’re not searching for tools mid-project with the cover already off.
- Vacuum cleaner with a crevice tool and brush attachment
- Soft-bristle brush or an old paintbrush
- Microfiber cloths for wiping down covers
- A bucket of warm water with a few drops of mild dish soap
- Needle-nose pliers for straightening bent fins
- A flathead screwdriver, in case covers are screwed rather than clipped
- Compressed air canister, useful for tight gaps between fins
- Work gloves and a dust mask, especially if you have allergies
Having this baseboard heater cleaning tools list ready ahead of time turns what could be a messy afternoon into a quick, contained task you can finish room by room.
DIY vs Professional Baseboard Heater Cleaning: Cost Comparison
Most homeowners never consider hiring out this task, and for good reason. Baseboard heater cleaning is one of the simpler home maintenance jobs, but it’s worth understanding the trade-offs either way.
| Factor | DIY Cleaning | Professional Cleaning |
|---|---|---|
| Typical cost | Under $20 in supplies, reusable each year | $75 to $150 per visit, depending on unit count |
| Time required | 15 to 25 minutes per unit | Similar time, but scheduled around availability |
| Skill level needed | Basic, no prior experience required | N/A |
| Best for | Routine annual or seasonal cleaning | Homes with many units or mobility limitations |
| Added value | None beyond the cleaning itself | Technician can flag wiring or plumbing issues |
For the vast majority of households, DIY baseboard heater cleaning is both cheaper and just as effective. Professional service becomes worth considering mainly when a technician’s inspection would catch a separate underlying issue.
Safety Precautions Before You Start
Skipping safety steps is one of the most common reasons people injure themselves or damage their heating system during a routine cleaning. A few precautions go a long way.
- Turn off the power at the breaker for electric units before removing any panel
- Shut off the thermostat or zone valve for hydronic systems and let pipes cool
- Wait until the unit is fully cool to the touch before handling any part of it
- Never spray liquid cleaner directly onto an electric heating element
- Handle the aluminum fins gently, since they bend and cut easily
- Keep pets and children away from the work area while covers are off
Once the unit has cooled and the power source is confirmed off, you’re ready to move on to the actual baseboard heater deep clean.
How to Clean Baseboard Heaters Step by Step
This is the core process that applies to nearly every baseboard heater, regardless of whether it’s electric or hydronic. Follow these steps for the best results.
- Turn off the power or heat source and allow the unit to cool completely before touching any part of it.
- Remove the end caps by gently pulling them away from the wall-mounted bracket, since most simply snap or slide off.
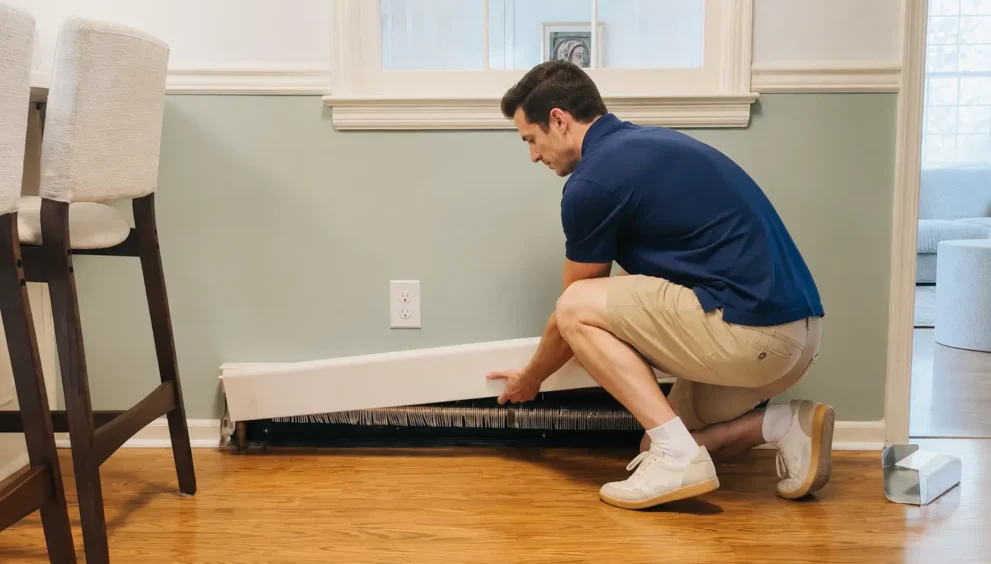
- Detach the front cover by lifting it slightly at the bottom and pulling it toward you, away from the wall.
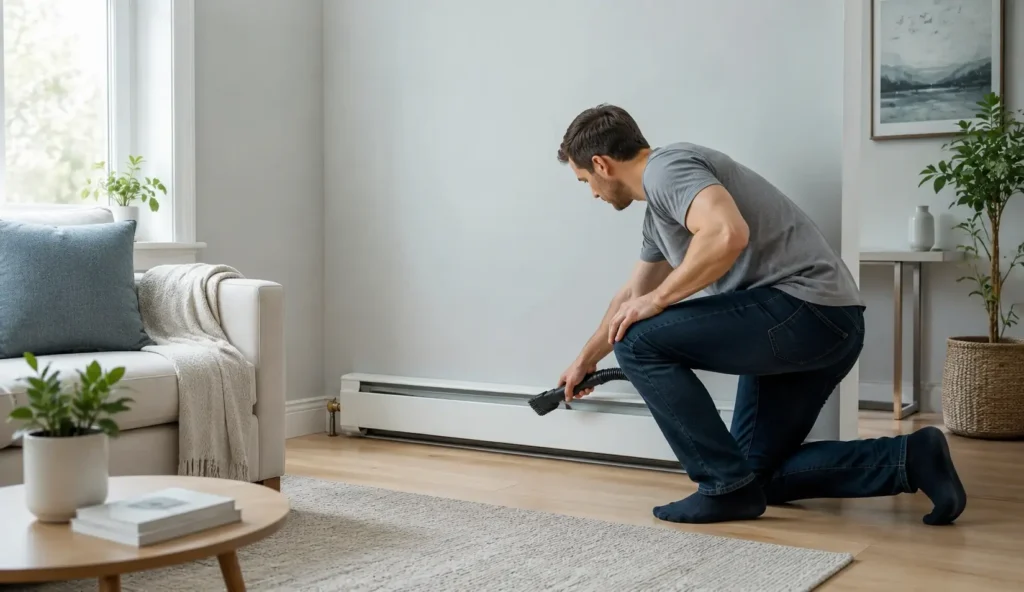
- Vacuum the fins thoroughly, using the crevice tool to reach between each one without bending them.
- Brush out stubborn debris with a soft-bristle brush for anything the vacuum alone can’t dislodge.
- Inspect for bent fins and straighten them carefully with needle-nose pliers, working slowly to avoid snapping them.
- Wipe down the cover with a damp microfiber cloth and mild soap, then dry it fully before reattaching.
- Reinstall the cover and end caps, then restore power or heat and confirm the unit runs quietly.
Following this baseboard heater maintenance guide from start to finish typically takes fifteen to twenty-five minutes per unit, depending on how much buildup has accumulated.
How to Clean Electric Baseboard Heaters
Electric units need extra caution since moisture near the heating coil creates a real shock and short-circuit risk. The key step: switch off the dedicated circuit breaker rather than relying on the wall thermostat alone, since some models stay partially live even when the thermostat is off. Once the cover is off, stick to dry cleaning only — vacuum plus compressed air — and keep any damp cloth limited to the exterior cover, well away from the coil and wiring.
For the complete step-by-step process, including fin inspection, wiring checks, and troubleshooting unusual noises, see the full guide: How to Clean Electric Baseboard Heaters Safely.
How to Clean Hydronic Baseboard Heaters
Hydronic, or hot-water, baseboard heaters run a copper pipe filled with heated water through the fin assembly, which makes them slightly more forgiving when it comes to moisture during cleaning.
To begin hydronic baseboard heater maintenance, turn off the thermostat or the zone valve controlling that section of the house, then wait for the pipe and fins to cool fully before opening the cover.
Vacuum the fins the same way you would on an electric unit, working the crevice tool carefully between each one. Because there’s no exposed electrical element, a lightly damp cloth can safely wipe down the fins if grime has built up.
If you notice a faint gurgling or air trapped in the line after cleaning, that’s usually unrelated to the cleaning itself and instead points toward air in the hydronic loop, which a heating technician can bleed out separately.
How to Clean Baseboard Heater Covers
The cover is what everyone actually sees, so keeping it clean matters both for airflow and appearance. Baseboard cover cleaning is simple, but a few details make the difference between a quick wipe and a lasting result.
- Remove the cover completely rather than wiping it in place, since dust collects on both sides
- Vacuum loose dust first before introducing any liquid, so you’re not smearing grime around
- Wash with a soft cloth dipped in warm, soapy water, then rinse with a barely damp cloth
- Dry the cover fully before reattaching it, since trapped moisture can lead to rust over time
- Check for rust spots or peeling paint while the cover is off, since this is the easiest time to touch them up
Cleaning the cover separately from the fins also gives you a chance to inspect the metal tabs and clips that hold everything in place, catching wear before it becomes a bigger repair.
How to Straighten Bent Baseboard Heater Fins
Bent fins are one of the most common issues homeowners discover once the cover comes off, and fixing them is a normal part of any baseboard heater deep clean rather than a sign something went wrong.
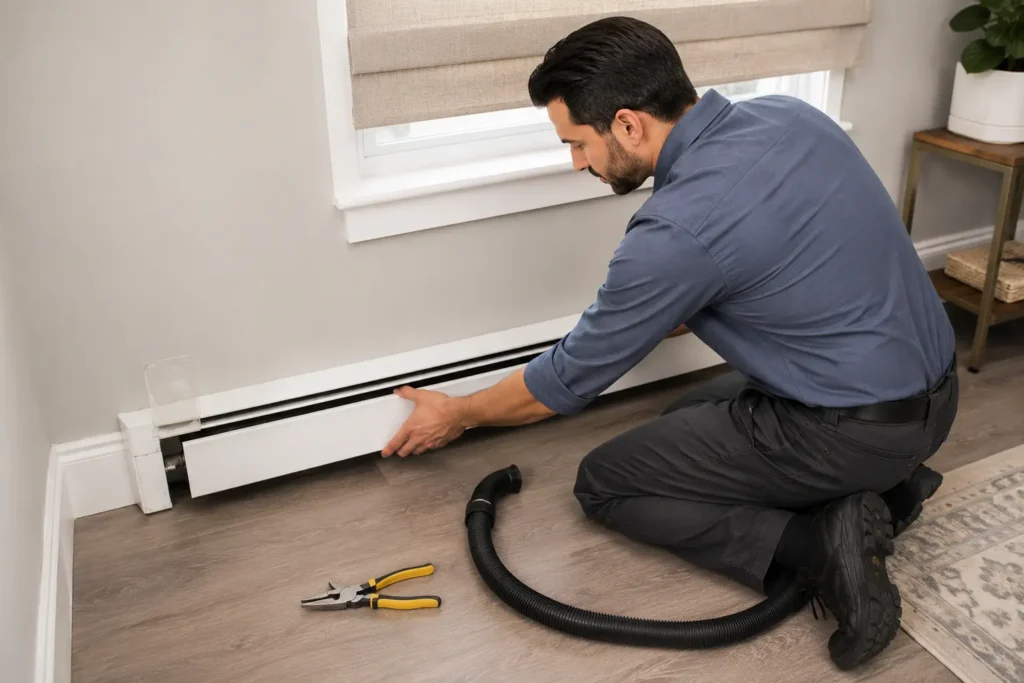
Working slowly is essential here, since aluminum fins bend easily but also snap if forced too quickly. A pair of needle-nose pliers gives you the control needed to nudge them back into place one at a time.
Start at one end of the unit and work steadily toward the other, gently straightening each bent section before moving to the next. Avoid grabbing large clusters of fins at once, since that tends to cause more bending than it fixes.
This heater fin straightening step restores proper spacing between each fin, which directly improves airflow and prevents the heater from working harder than it needs to.
How to Remove Rust From Baseboard Heater Fins
Rust develops on baseboard heater fins for a few common reasons, usually tied to nearby humidity, condensation, or a small leak in a hydronic line. Addressing it early prevents further metal damage.
Start with a soft brush to remove loose surface rust from the fins, working gently so you don’t bend or snap them in the process. Avoid steel wool, since it can scratch and accelerate corrosion.
For light rust, a cloth dampened with a mild vinegar-and-water solution can help dissolve buildup on hydronic fins specifically. Always dry the area completely afterward to prevent the rust from returning.
If you notice rust on the exterior cover rather than the internal fins, lightly sand the affected area, then apply a heat-resistant metal primer and matching paint once the surface is clean and dry.
Persistent or spreading rust on a hydronic unit sometimes signals a slow leak rather than simple surface corrosion, which is worth having a technician check before it damages the surrounding floor or wall.
Removing Dust, Pet Hair, and Allergens From Baseboard Heaters
Homes with pets accumulate fur inside baseboard heaters at a noticeably faster rate than pet-free households, since fur constantly circulates near floor level where the intake gap sits.
For effective baseboard heater allergen removal, vacuum thoroughly first, then follow up with compressed air to dislodge anything wedged deep between the fins that the vacuum nozzle couldn’t reach directly.
Households with allergy sufferers benefit from wearing a dust mask during the process, since a season’s worth of trapped dander gets stirred into the air the moment the cover comes off.
For particularly stubborn buildup, a long-handled duster for heaters can reach the full depth of the unit without requiring you to remove the cover fully, which works well for quick mid-season touch-ups between deep cleans.
Baseboard Heater Odor Removal: Why It Smells When You Turn It On
That faint burning smell during the first cold day of the season is one of the most common questions homeowners ask, and it almost always traces back to dust rather than a malfunction.
Throughout the warmer months, the fins sit dormant while dust, skin cells, and fibers slowly settle between them. When the heat kicks on again, that accumulated layer burns off within the first hour or two of use.
For most households, this is simply an annoyance rather than a safety concern, and it fades once the initial layer has burned away. Cleaning the unit before heating season starts eliminates most of this smell entirely.
If the odor lingers well beyond the first few hours, or smells more like burning plastic than dust, that’s a different situation. Turn the unit off and have it inspected before continuing to use it.
Cleaning Baseboard Heaters in Homes With Pets
Pet owners deal with baseboard heater buildup at a noticeably faster pace than pet-free households, since fur and dander constantly circulate near floor level where the intake gap draws air in.
A few adjustments make a real difference for pet households specifically:
- Clean fins every three to four months instead of once or twice a year
- Groom pets regularly during shedding seasons to reduce loose fur in the air
- Vacuum floors near heaters weekly, since fur collects there before it reaches the unit
- Use a vacuum with a pet-hair attachment for more effective fin cleaning
- Check fins mid-winter for early buildup rather than waiting until spring
Cats and dogs that spend most of their time indoors tend to contribute the most buildup, simply because they’re shedding near the heater far more often than an outdoor pet would.
How Often Should You Clean Baseboard Heaters
Cleaning frequency depends heavily on your household situation, not just the calendar. The table below breaks down realistic timing based on common living situations.
| Household Type | Recommended Cleaning Frequency |
|---|---|
| No pets, low dust, single occupant | Once a year, before heating season |
| Average household, no pets | Once a year, ideally in early fall |
| Homes with one or two pets | Twice a year, fall and spring |
| Homes with multiple pets or carpet throughout | Every three to four months |
| Households with allergies or asthma | Twice a year, plus mid-season vacuuming |
As a general rule, cleaning right before heating season begins prevents that first-use burning smell, while a spring cleaning removes anything left over from a full winter of use.
How to Clean Heater Vents and Airflow Openings
Beyond the fins themselves, the intake and outlet openings on the cover deserve their own attention, since dust and debris can collect right at these narrow slots over time.
Use the vacuum’s brush attachment along the full length of both the bottom intake gap and the top outlet vents, moving slowly to catch dust sitting right at the opening rather than deeper inside.
A slim, flexible duster or a folded microfiber cloth also works well here, especially for reaching narrow decorative slots that a vacuum nozzle can’t fully access without wedging into the gap.
Keeping these openings clear matters just as much as cleaning the fins, since even a spotless interior won’t heat efficiently if the entry and exit points for airflow stay partially blocked.
Preventive Maintenance Tips
A few small habits between deep cleans can meaningfully reduce how much dust and debris builds up inside the unit in the first place, extending the time between full cleaning sessions.
- Vacuum the floor and baseboards near the heater weekly to reduce nearby dust sources
- Keep furniture and curtains at least six inches away from the unit to protect airflow
- Seal visible gaps around pipes or the wall with heat-resistant caulk to block outside dust
- Groom pets regularly if shedding is heavy, since loose fur is a major contributor
- Change HVAC filters on schedule, since a dirty central filter pushes more dust throughout the house
These small steps for baseboard heating system upkeep don’t replace an annual deep clean, but they do stretch the time between sessions and keep efficiency more consistent overall.
Think of prevention as maintenance between maintenance. None of these habits take more than a few minutes, yet together they meaningfully reduce how much dust accumulates before your next full cleaning session arrives.
Common Mistakes to Avoid
Even a well-intentioned cleaning attempt can cause more harm than good if a few common missteps slip in. Watch out for these particular mistakes.
- Spraying liquid cleaner directly onto an electric heating coil, which risks a short circuit
- Forcing a vacuum nozzle too aggressively between fins, which bends or snaps them
- Skipping the breaker shut-off step because the thermostat “looks” off
- Using abrasive scrubbers on painted covers, which strips the finish and invites rust
- Reassembling the cover before it’s fully dry, trapping moisture against the metal
Avoiding these mistakes keeps your baseboard heater cleaning safe and effective rather than accidentally creating a new problem to fix.
Most of these errors come from rushing the process rather than a lack of skill. Slowing down, working section by section, and double-checking the power source before touching anything prevents nearly every common mistake on this list.
How Cleaning Improves Efficiency and Lowers Energy Bills
Dust doesn’t just look unpleasant sitting inside a heater; it actively insulates the fins and blocks the airflow the entire system depends on to function properly.
A heavily clogged unit can lose a meaningful percentage of its heating efficiency, which means it runs longer to reach the same temperature. That extra runtime shows up directly on your energy bill each month.
Regular baseboard heater efficiency improvement through cleaning restores proper airflow, so the system reaches your target temperature faster and shuts off sooner, rather than running continuously in the background.
Over a full heating season, this difference adds up. A clean, well-maintained system consistently uses less energy than a dusty one working overtime to compensate for blocked fins.
How Baseboard Heater Cleaning Affects Indoor Air Quality
Since baseboard heaters constantly pull room air through their fins, whatever gets trapped inside eventually gets redistributed back into the room every time the system runs.
A clogged unit doesn’t just reduce heating efficiency; it also acts as a reservoir for dust, pollen, and pet dander that recirculates every time the convection cycle starts up again.
For anyone managing allergies or asthma, this connection between heating and indoor air quality is worth taking seriously. Regular cleaning removes a genuine source of airborne irritants, not just a cosmetic issue.
Pairing baseboard heater cleaning with a broader home heating maintenance tips routine, such as changing HVAC filters and dusting nearby surfaces, compounds the air quality benefit throughout the entire heating season.
Troubleshooting: When Cleaning Isn’t Enough
Most baseboard heater problems trace back to dust and debris, but cleaning alone doesn’t fix every issue. Here’s how to tell when the problem runs deeper than buildup.
- Heater stays cold after cleaning: Check the thermostat setting and circuit breaker before assuming a bigger fault exists.
- Persistent rattling noise: This usually points to a loose cover or bracket rather than dirty fins.
- Uneven heat across the room: Furniture blocking airflow is a more likely cause than dust buildup alone.
- Gurgling sounds in hydronic systems: Trapped air in the line typically needs a professional bleed, not cleaning.
- Burning smell that doesn’t fade: If it persists well after the first heating cycle, call a technician immediately.
If a thorough cleaning doesn’t resolve the issue, it’s a reasonable signal that baseboard heater troubleshooting has moved beyond a DIY fix and into territory better handled by a licensed HVAC professional.
Seasonal Baseboard Heater Cleaning Checklist
Use this quick-reference checklist to stay on top of winter heater preparation each year without having to reread the full guide every time.
- Vacuum and inspect every unit in early fall, before the heating season begins
- Straighten any bent fins found during the fall inspection
- Wipe down covers and check for rust or peeling paint
- Confirm nothing is blocking airflow, including furniture, curtains, or rugs
- Do a mid-winter check for households with pets or heavy dust
- Repeat a lighter cleaning in spring once the heating season ends
Following this checklist consistently is one of the simplest home heating maintenance tips available, and it turns a once-dreaded chore into a quick, predictable seasonal routine.
Long-Term Benefits of Regular Maintenance
Consistent baseboard heater annual maintenance pays off in ways that go beyond a single winter. With proper care, both electric and hydronic units commonly last fifteen to twenty years or longer.
Systems that are cleaned regularly experience less strain on their internal components, since clear airflow means the heating element or hot water pipe doesn’t have to compensate for blocked fins.
This translates directly into fewer repairs over the life of the unit, since dust buildup is one of the most common preventable causes of reduced performance and premature wear.
Beyond the mechanical benefits, a well-maintained heater also holds its resale value better if you ever sell your home, since visibly clean, rust-free units signal a well-cared-for heating system to buyers.
Frequently Asked Questions
How do I know if my baseboard heater needs cleaning?
A burning-dust smell on first use, visible fur or dust on the fins, slower heating, and rising energy bills are all common signs. If you notice two or more, it’s time for a cleaning session before the season gets colder. Checking behind the cover once a year, even without obvious symptoms, helps you catch buildup early.
Can I clean a baseboard heater myself without calling a professional?
Yes, in almost every case. Baseboard heater cleaning is a straightforward DIY task that mainly requires a vacuum, a soft brush, and about twenty minutes per unit, as long as you follow the correct safety steps. No specialized tools or prior experience are needed to get a thorough result.
Is it safe to vacuum baseboard heater fins?
Yes, vacuuming is the safest and most effective way to clean the fins. Use a brush or crevice attachment and work gently, since the aluminum fins bend easily under too much pressure or a stiff nozzle. Moving slowly along the length of the unit gives the most thorough, damage-free clean.
How often should baseboard heaters be cleaned?
Most households only need one cleaning a year, timed just before heating season. If you have pets, heavy carpeting, or allergy concerns, twice a year — fall and spring — keeps performance consistent. Multiple pets or heavy shedding usually call for a quick fin check every few months rather than waiting for the seasonal clean.
Is it safe to use water on a baseboard heater?
It depends on the type. On electric units, water should never go past the exterior cover — the coil and wiring must stay completely dry, so a vacuum and dry brush handle the inside. Hydronic units are more forgiving; a lightly damp cloth on the fins is fine since there’s no live electrical element to worry about. Either way, confirm the power source is off before you start.
What causes a burning smell when I first turn on my heater?
That smell is usually dust and debris burning off the fins after months of inactivity. A pre-season cleaning largely eliminates it, since there’s far less buildup left to burn once the fins are clear. The smell should fade within an hour or two of the first use each season.
How do I fix bent fins on a baseboard heater?
Use needle-nose pliers to gently straighten each bent fin one at a time, working slowly to avoid snapping them. Straight, evenly spaced fins allow air to flow properly and restore full heating efficiency. Working from one end of the unit to the other keeps the process organized and controlled.
Do baseboard heaters need to be professionally cleaned?
Not usually. Most baseboard heater cleaning is well within reach of an average homeowner. Professional help becomes worthwhile only when you encounter wiring issues, persistent noise, or a hydronic system that needs air bled from the line. Routine cleaning itself rarely requires a technician visit.
Can dirty baseboard heaters increase my energy bill?
Yes. Dust-clogged fins block airflow, forcing the system to run longer to reach the same temperature. Regular cleaning restores efficiency and is one of the simplest ways to reduce unnecessary heating costs. Over a full season, this small habit can add up to a noticeable difference.
What’s the difference between cleaning electric and hydronic baseboard heaters?
Electric units require strictly dry cleaning near the coil to avoid shock risk, while hydronic units tolerate a lightly damp cloth on the fins. Both still follow the same basic vacuum-and-inspect process overall. The main distinction always comes down to how each system handles moisture.
Final Thoughts
A clean baseboard heater runs quieter, heats faster, and costs less to operate than one left untouched for years at a time. The process itself takes only minutes once you know the right order of steps.
Whether you’re dealing with electric coils or a hydronic copper pipe, the fundamentals stay the same: power down safely, remove the cover, vacuum thoroughly, straighten any bent fins, and reassemble everything carefully.
Building this into an annual or twice-yearly habit keeps your heating system running efficiently through every season while also improving the air quality inside your home. A few minutes of maintenance now saves real money later.
Bookmark this guide and revisit it each fall before you turn the heat back on. With the steps, tools, and troubleshooting covered here, you now have everything needed to keep every baseboard heater in your home clean, efficient, and running the way it should for years to come.