Why Proper Cleaning Matters for Your Conch Piercing
Getting a conch piercing is exciting; it’s bold, stylish, and instantly elevates your look. But how to Clean Your Conch Piercing Safely at Home becomes the real challenge once the initial excitement fades and the healing phase begins. Many people underestimate aftercare, only to face irritation, swelling, or even infection within days.
From a practical standpoint, your ear cartilage has limited blood flow compared to soft tissue. That means slower healing and a higher risk of complications if hygiene is inconsistent. So instead of experimenting with random methods, a structured, evidence-based routine is essential. The goal is simple: reduce bacteria, minimize trauma, and support natural healing without interference.
Understanding the Sensitivity of a Fresh Conch Piercing
A conch piercing sits in thick cartilage, making it significantly more sensitive than a lobe piercing. This explains why even light pressure, like sleeping on it or using a Q-tip, can feel disproportionately painful. For a deeper understanding of what to expect, including healing stages and discomfort levels, refer to this conch piercing pain, healing time, and care guide.
From user experiences across forums and piercing communities, one pattern stands out: most complications don’t come from “lack of cleaning,” but from over-cleaning and excessive handling. People assume more action equals better healing, when in reality, irritation often comes from unnecessary interference.
So the mindset shifts from “clean aggressively” to clean strategically and gently.
Sleeping Habits: The Hidden Cause of Delayed Healing
One of the most overlooked issues is sleep positioning. If you’re a side sleeper, applying pressure on a fresh conch piercing can:
- Increase swelling
- Cause jewelry migration
- Trigger painful inflammation
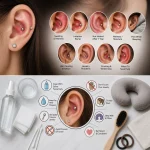
Even if it doesn’t hurt immediately, micro-pressure disrupts tissue repair. A practical workaround widely recommended by professional piercers is using a travel pillow. Position your ear in the center hole so there’s zero contact.
This isn’t optional advice; it’s preventive care. Ignoring it often leads to bumps or prolonged healing.
The Right Way to Clean Without Causing Trauma
When thinking about how to Clean Your Conch Piercing Safely at Home, simplicity wins over complexity. The safest and most widely recommended method is sterile saline solution.
Why Saline Works
Saline (0.9% sodium chloride) mimics your body’s natural fluids. It cleans without disrupting tissue or drying out the skin—unlike alcohol or hydrogen peroxide.
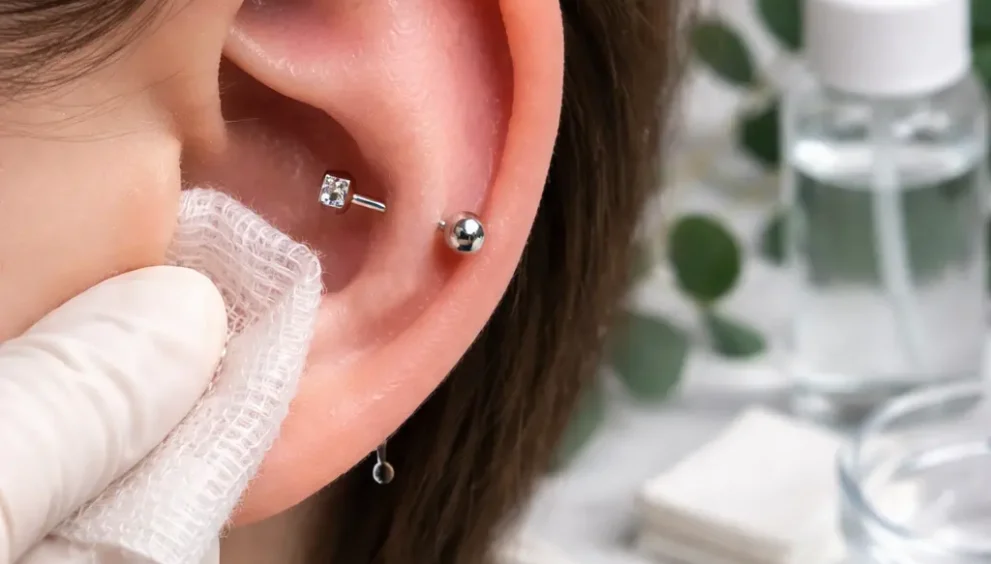
Practical Cleaning Routine
- Spray sterile saline directly onto the piercing once or twice daily
- Let it sit for a few minutes to loosen debris
- Rinse gently in the shower (avoid direct water pressure)
- Pat dry using non-woven gauze or a paper towel
This method aligns with the “LITHA” principle, Leave It The Hell Alone, which many experienced piercers advocate. The idea is minimal interference, maximum healing.
Q-Tips, Cotton Pads, or No Touch at All?
Here’s where opinions differ, and critical thinking matters.
Using Q-tips soaked in saline can help remove visible crust, but they come with risks:
- Fibers may get caught in jewelry
- Pressure can irritate the wound
- Over-cleaning may delay healing
A safer approach is selective use. Only use a Q-tip when necessary, and apply minimal pressure. Otherwise, let saline and shower rinsing do most of the work.
The key takeaway: clean debris, don’t scrub tissue.
Showering: Helpful or Harmful?
Many people wonder whether rinsing in the shower is safe. The answer is yes with conditions.
Warm water helps soften crust and naturally flush bacteria. However:
- Avoid directing strong water pressure onto the piercing
- Keep shampoo, conditioner, and soap away from the area
- Always rinse thoroughly to remove residue
Think of shower rinsing as a supportive step, not your primary cleaning method. Saline remains the core routine.
Should You Rotate or Move the Jewelry?
This is one of the most persistent myths in piercing aftercare.
Older advice suggested rotating jewelry to “prevent sticking.” Modern piercing science rejects this. Moving the jewelry:
- Causes micro-tears in healing tissue
- Introduces bacteria into the wound
- Prolongs inflammation
The correct approach is straightforward: do not twist, push, or adjust the jewelry. Your body will heal around it naturally.
Managing Pain, Swelling, and “Crusties”
During the first few weeks, some discomfort is completely normal. You may notice:
- Mild redness
- Tenderness
- Clear or white crust forming around the jewelry
These are not signs of infection; they’re part of healing. The body is sealing the wound and pushing out lymph fluid.
Smart Management Strategy
- Use saline soaks or sprays consistently
- Avoid touching or picking the crust
- Allow debris to fall off naturally during showers
However, if you notice yellow/green discharge, severe swelling, or heat, that indicates infection and requires professional attention.
Realistic Healing Timeline (Not the Idealized Version)
While many guides claim 6–12 months for healing, real-world experiences suggest variability. For some, especially with cartilage, it can extend to 12–18 months.
Healing depends on:
- Your immune system
- Sleep habits
- Aftercare consistency
- External irritation (headphones, hair, etc.)
If healing is delayed or disrupted, it often leads to issues covered in this common conch piercing problems and how to fix them. So instead of rushing to change jewelry, focus on stability. Premature changes are one of the most common causes of complications.
Common Mistakes That Sabotage Healing
Even with good intentions, certain habits can derail your progress:
- Using alcohol or peroxide (too harsh)
- Sleeping on the piercing
- Over-cleaning multiple times a day
- Touching with unwashed hands
- Wearing tight headphones or earbuds
Each of these introduces either bacteria or mechanical stress, two primary enemies of healing.
Practical Tips for Faster, Safer Recovery
To optimize healing, small adjustments make a big difference:
- Keep hair tied back, especially when wet
- Change pillowcases regularly
- Avoid swimming in pools or hot tubs early on
- Maintain a balanced diet and hydration
Healing is not just external, it’s systemic. Your body needs proper nutrition to repair tissue effectively.
When to Seek Professional Help
Self-care works in most cases, but there are limits. Consult a professional piercer or doctor if you notice:
- Persistent swelling beyond a few days
- Intense pain increasing over time
- Colored discharge (yellow/green)
- Fever or spreading redness
Early intervention prevents long-term damage or scarring.
Conclusion: Clean Less, Heal Better
Mastering How to Clean Your Conch Piercing Safely at Home isn’t about doing more—it’s about doing the right things consistently. A gentle saline routine, combined with minimal interference, creates the ideal environment for healing.
Avoid outdated practices like rotating jewelry or overusing harsh products. Ultimately, patience is your biggest asset.
Cartilage piercings demand time, but with disciplined aftercare, you’ll end up with a healthy, well-healed piercing that looks exactly the way you envisioned.